vue中各种语法结构和语法糖看着实在是一头雾水,现在决定从头敲一个UI界面出来,这里是黑马程序员的小兔鲜
需要的组件
router
vue的路由组件
该组件需要全局注册
element plus
基于vue3组件库,可以让组件更加好看,更加容易操作
在进行下载操作后
1
| npm install element-plus --save
|
可以进行导入
1
2
| import ElementPlus from 'element-plus'
import 'element-plus/dist/index.css'
|
按需进行自动导入。但在自动导入前需要先下载unplugin-vue-components和unplugin-auto-import这两款插件
1
| npm install -D unplugin-vue-components unplugin-auto-import
|
在vite配置文件中进行导入
1
2
3
4
5
6
7
8
9
10
11
12
13
14
15
16
17
| import { defineConfig } from 'vite'
import AutoImport from 'unplugin-auto-import/vite'
import Components from 'unplugin-vue-components/vite'
import { ElementPlusResolver } from 'unplugin-vue-components/resolvers'
export default defineConfig({
plugins: [
AutoImport({
resolvers: [ElementPlusResolver()],
}),
Components({
resolvers: [ElementPlusResolver()],
}),
],
})
|
安装了unplugin-element-plus插件后,在vite配置文件中进行导入
1
2
3
4
5
6
7
| import { defineConfig } from 'vite'
import ElementPlus from 'unplugin-element-plus/vite'
export default defineConfig({
plugins: [ElementPlus()],
})
|
一般使用scss文件进行更换,详情点击这里
需要下载scss相关依赖
axios
axios是一个基于promise的HTTP客户端,用于浏览器和node.js环境,一般可以直接安装
然后在项目中引入axios
1
| const axios = require('axios');
|
在ES6后,可以直接引入
1
| import axios from 'axios'
|
路由组件
vue中不同页面或者组件的跳转需要通过路由实现,该组件也需要安装
iconfont
iconfont是阿里巴巴提供的共享图标库,可以在里面创建项目以使用各种图标
其中,font-class引用更为普遍,以下是通过font-class引用的方法
1
| <link rel="stylesheet" href="">
|
1
| <i class="iconfont icon-xxx" />
|
vue_use
VueUse是基于组合式 API的实用函数集合。可用于响应DOM中发生的各种事件,相比DOM可读性和简易性都提高了不少。
在v12.0后,vueuse不再支持vue2
pinia
pinia是vue3中的Store管理库
什么是Store?Store有点像一个作为全局变量的组件,所有组件搜可以读取或写入它。Store对应着三个概念:state、getter和action,可以分别对应着组件中的data、computed和methods
该依赖也需要安装
该组件需要全局注册
dayjs
dayjs用于格式化日期输出的数据
项目起步
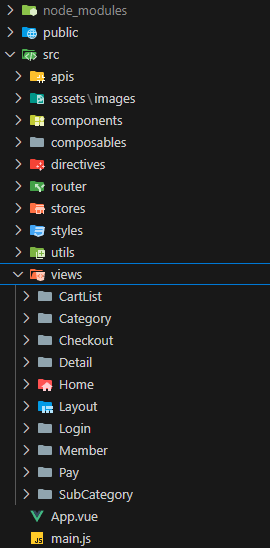
创建文件夹
为方便接下来指代方便,在项目中创建以下文件夹
axios基础配置
在utils文件夹下新建http.js文件,用于存放数据拦截器,处理HTTP请求
首先是定义自己所要使用的axios实例默认值
1
2
3
4
| const httpInstance = axios.create({
baseURL: 'http://pcapi-xiaotuxian-front-devtest.itheima.net',
timeout: 5000,
})
|
此处的baseURL为黑马小兔鲜的后端接口。如果自己配置有后端,也可以使用localhost/8080。timeout为5秒,也可以设置更长一段时间。
然后是设置拦截器的样式,在请求或响应被then或catch处理前拦截它们,做出相应的操作
请求式拦截器的样式如下。请求式拦截器主要作用为在每个请求发送前,统一对请求配置进行处理。此处为检验用户是否已登录并存在Token,若为真则将token添加到请求头中,以进行身份验证,最后,返回已经修改过的config对象,确保请求能正常发送。
1
2
3
4
5
6
7
8
| httpInstance.interceptors.request.use(config => {
const userStore = useUserStore()
const token = userStore.userInfo.token
if (token) {
config.headers.Authorization = `Bearer ${token}`
}
return config
}, e => Promise.reject(e))
|
响应式拦截器的样式如下。响应式拦截器统一处理服务器返回的响应数据。此处主要是处理报错数据。若成功响应,则直接返回res.data。若返回错误,则执行第二个回调函数。
该函数通过ElMessage显示一个警告信息,并将报错内容显示出来。
若错误状态码为401(未授权或token失败),则清除用户信息并跳转至登陆界面,提示用户重新登录
1
2
3
4
5
6
7
8
9
10
11
12
13
14
| httpInstance.interceptors.response.use(res => res.data, e => {
const userStore = useUserStore()
ElMessage({
type: 'warning',
message: e.response.data.message
})
if(e.response.status === 401) {
userStore.clearUserInfo()
router.push('/login')
}
return Promise.reject(e)
})
|
最后执行默认导出。默认导出可以只导出一个默认值,在其他文件导入时,可以使用任意名称来引用这个默认导出的值。
1
| export default httpInstance
|
这样,该项目的任意地方都可以引入这个实例来发送请求
1
2
3
4
5
| import http from '@/utils/http';
http.get('/api/example').then(response => {
console.log(response);
});
|
当然,在后面具体的API请求中,和上面的实例还是存在一定区别的。
项目整体路由设计
如前文所述,vue中不同页面或者组件的跳转需要通过路由实现。因此需要通过专门的文件来管理路由。在router文件夹下创建index.js文件,用于管理整个项目的路由跳转配置。项目中用到的全部路由如下。当然,在具体实践中应该为某个功能开始写的时候才配置路由。
1
2
3
4
5
6
7
8
9
10
11
12
13
14
15
16
17
18
19
20
21
22
23
24
25
26
27
28
29
30
31
32
33
34
35
36
37
38
39
40
41
42
43
44
45
46
47
48
49
50
51
52
53
54
55
56
57
58
59
60
61
62
63
64
65
66
67
68
69
70
71
72
73
74
75
76
77
78
79
80
81
82
83
84
| import { createRouter, createWebHistory } from 'vue-router'
import Login from '@/views/Login/index.vue'
import Layout from '@/views/Layout/index.vue'
import Home from "@/views/Home/index.vue"
import Category from "@/views/Category/index.vue"
import SubCategory from "@/views/SubCategory/index.vue"
import Detail from '@/views/Detail/index.vue'
import CartList from '@/views/CartList/index.vue'
import Checkout from '../views/Checkout/index.vue'
import PayBack from '../views/pay/payBack.vue'
import Pay from '../views/pay/index.vue'
import Member from '../views/Member/index.vue'
import Userinfo from '../views/Member/components/Userinfo.vue'
import UserOrder from '../views/Member/components/UserOrder.vue'
const router = createRouter({
history: createWebHistory(import.meta.env.BASE_URL),
routes: [
{
path: '/',
component: Layout,
children: [
{
path: "category/:id",
component: Category
},
{
path: "category/sub/:id",
component: SubCategory
},
{
path: 'detail/:id',
component: Detail
},
{
path: "",
component: Home
},
{
path: 'cartlist',
component: CartList
},
{
path: 'checkout',
component: Checkout
},
{
path: 'pay',
component: Pay
},
{
path: 'paycallback',
component: PayBack
},
{
path: 'member',
component: Member,
children:[
{
path: '',
component: Userinfo
},
{
path: 'order',
component: UserOrder
}
]
}
]
},
{
path: '/login',
component: Login
},
],
scrollBehavior() {
return {
top: 0
}
}
})
export default router
|
路径下方的路由行为检测是为了在跳转页面时自动跳转到页面顶端。
element-plus主题色改变
在style文件夹下新增element文件夹,并在该文件夹下新增index.scss文件,放置主题色相关文件
1
2
3
4
5
6
7
8
9
10
11
12
13
14
15
16
17
18
19
| @forward 'element-plus/theme-chalk/src/common/var.scss' with (
$colors: (
'primary': (
'base':#27ba9b,
),
'success': (
'base':#1dc779,
),
'warning': (
'base':#ffb302,
),
'dander': (
'base':#e26237,
),
'error': (
'base':#cf4444,
),
)
);
|
然后配置ElementPlus采用scss样式配色系统
1
2
3
4
5
6
7
8
9
10
11
12
13
14
15
16
17
18
19
20
| export default defineConfig({
plugins: [
AutoImport({
resolvers: [ElementPlusResolver()],
}),
Components({
resolvers: [
ElementPlusResolver({
importStyle:"sass",
})
],
}),
],
})
|
剩下的工作在下一节
scss文件的自动导入
在项目里一些组件的css属性需要反复调用。为了省去调用的步骤,可以进行自动导入。在vite.config.js文件中插入其css属性
1
2
3
4
5
6
7
8
9
10
11
12
13
14
15
| export default defineConfig({
css: {
preprocessorOptions: {
scss: {
additionalData: `
@use "@/styles/element/index.scss" as *;
@use "@/styles/var.scss" as *;
`,
},
},
},
})
|
此处也包含了自动引入element-plus的导入,这部分在此处起到了样式覆盖的作用,也是必要的一部分
在vite.config.js文件中还可以定义其他属性,例如默认src下的目录均为@的写法
1
2
3
4
5
| resolve: {
alias: {
'@': fileURLToPath(new URL('./src', import.meta.url))
},
}
|
(但在现在可以编辑器自动补全和typescript自动导入的情况下还有必要这么做吗?)
全局scss样式指定
在style文件夹下新建common.scss文件,指定全局样式,点击查看代码
完整代码
common.scss
1
2
3
4
5
6
7
8
9
10
11
12
13
14
15
16
17
18
19
20
21
22
23
24
25
26
27
28
29
30
31
32
33
34
35
36
37
38
39
40
41
42
43
44
45
46
47
48
49
50
51
52
53
54
55
56
57
58
59
60
61
62
63
64
65
66
67
68
69
70
71
72
73
74
75
76
77
78
79
80
81
82
83
84
85
86
87
88
89
90
91
92
93
94
95
96
97
98
99
100
101
102
103
104
105
106
107
108
109
110
111
112
113
|
* {
box-sizing: border-box;
}
html {
height: 100%;
font-size: 14px;
}
body {
height: 100%;
color: #333;
min-width: 1240px;
font: 1em/1.4 'Microsoft Yahei', 'PingFang SC', 'Avenir', 'Segoe UI',
'Hiragino Sans GB', 'STHeiti', 'Microsoft Sans Serif', 'WenQuanYi Micro Hei',
sans-serif;
}
body,
ul,
h1,
h3,
h4,
p,
dl,
dd {
padding: 0;
margin: 0;
}
a {
text-decoration: none;
color: #333;
outline: none;
}
i {
font-style: normal;
}
input[type='text'],
input[type='search'],
input[type='password'],
input[type='checkbox'] {
padding: 0;
outline: none;
border: none;
-webkit-appearance: none;
&::placeholder {
color: #ccc;
}
}
img {
max-width: 100%;
max-height: 100%;
vertical-align: middle;
background: #ebebeb url('@/assets/images/200.png') no-repeat center / contain;
}
ul {
list-style: none;
}
#app {
background: #f5f5f5;
user-select: none;
}
.container {
width: 1240px;
margin: 0 auto;
position: relative;
}
.ellipsis {
white-space: nowrap;
text-overflow: ellipsis;
overflow: hidden;
}
.ellipsis-2 {
word-break: break-all;
text-overflow: ellipsis;
display: -webkit-box;
-webkit-box-orient: vertical;
-webkit-line-clamp: 2;
overflow: hidden;
}
.fl {
float: left;
}
.fr {
float: right;
}
.clearfix:after {
content: '.';
display: block;
visibility: hidden;
height: 0;
line-height: 0;
clear: both;
}
.el-breadcrumb__inner.is-link {
font-weight: 400 !important;
}
|